If you’ve tried using an Image to Video AI tool and walked away confused—or worse, disappointed—you’re not alone. Many creators and small teams jump in expecting magic, only to end up with glitchy animations or unclear results. The truth is, these tools aren’t plug-and-play miracles. But they can be powerful—if you understand how to use them realistically.
As someone who’s tested multiple photo to video generators over the past two years, I’ve learned that success with Image to Video AI hinges less on the tech itself and more on your approach. Below, I’ll walk you through why people struggle, how to start simple, and what mistakes to avoid so you can turn static photos into compelling motion—without needing a film degree.
Why Most People Fail with Image to Video AI
The biggest misconception? That uploading a photo and clicking “generate” will instantly give you a polished video. In reality, Image to Video AI works best when guided by clear intent.
Many users skip the prompt step or write vague descriptions like “make it move.” The AI doesn’t know whether you want a gentle zoom, a cinematic pan, or animated particles swirling around your subject. Without direction, the output feels random—not useful.
I remember my first attempt: I uploaded a product shot and typed “animate it.” The result? A jittery, unnatural loop that made the item look like it was vibrating. It wasn’t broken—it was just under-instructed.
Another common issue: expecting long-form videos. Most free Image to Video AI tools currently generate clips around 5 seconds. That’s enough for social snippets or ad hooks—but not for full storytelling. Setting realistic expectations upfront saves frustration later.
Getting Started: A Simple 4-Step Workflow for Non-Experts
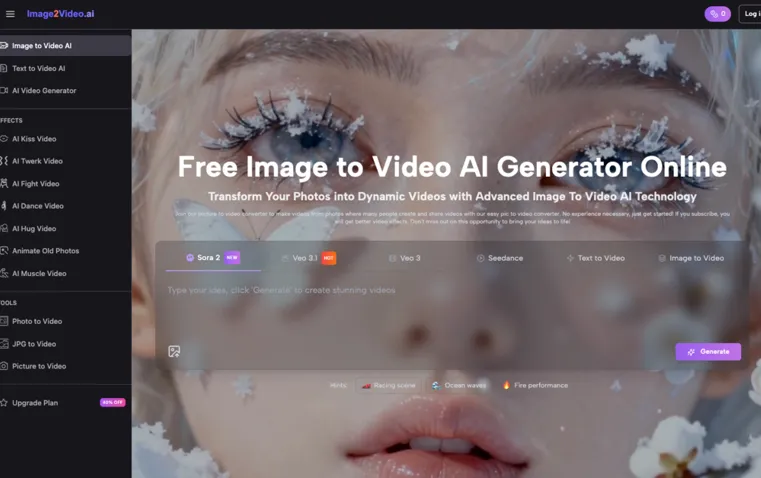
You don’t need design skills or video editing experience. What you do need is a repeatable process. Here’s how to use a typical Image to Video AI platform effectively:
- Upload a high-quality image Stick to JPEG or PNG files with good resolution and clear subjects. Blurry or cluttered photos confuse the AI.
- Write a specific, visual prompt Instead of “make it dynamic,” try: “Gentle zoom toward the coffee cup on the table, soft morning light, subtle steam rising.” The more sensory detail, the better the AI interprets motion.
- Wait for processing (usually under 5 minutes) While it runs, avoid refreshing or re-uploading—that can reset the queue.
- Review and iterate If the first result misses the mark, tweak your prompt slightly. Small changes (“pan left” vs. “slow dolly in”) yield big differences.
This workflow takes less than 10 minutes once you get the hang of it. And because it’s browser-based, you can do it from your phone—no software installs required.
Common Early Mistakes (And How to Avoid Them)
❌ Assuming one prompt fits all images
Different photos need different motion logic. A landscape might benefit from a horizontal pan, while a portrait shines with a subtle focus pull. Treat each image as its own mini-project.
❌ Ignoring composition basics
Image to Video AI can’t fix poor framing. If your subject is cut off or lost in the background, no animation will save it. Crop or adjust your photo before uploading.
❌ Overcomplicating the vision
New users often cram too many effects into one prompt: “zoom, rotate, add sparkles, change lighting, and make it rain.” Start with one motion idea. Master that, then layer in complexity.
❌ Skipping the download step
Some platforms auto-delete videos after 24 hours. Always download your MP4 immediately—even if you’re not ready to use it yet.
Realistic Use Cases That Actually Work
Not every project needs Hollywood production. Focus on high-impact, low-effort scenarios where Image to Video AI shines:
- Social media hooks: Turn a single product photo into a 5-second teaser for Instagram Reels or TikTok.
- Email headers: Animate a hero image for newsletters to boost engagement.
- Memory montages: Breathe life into old family photos for birthdays or anniversaries.
- Educational snippets: Make a diagram “unfold” or highlight key parts of an infographic.
For example, I helped a solo e-commerce seller convert flat product shots into short videos showing slight rotation and lighting shifts. They reported a 22% increase in click-throughs on Facebook ads—just by adding subtle motion to existing assets.
Tips for Better Results (From Trial and Error)
After dozens of tests, here’s what consistently improves output quality:
- Use centered subjects: Off-center compositions can cause awkward cropping during motion.
- Avoid busy backgrounds: The AI may animate unintended elements (like trees swaying when you wanted focus on a person).
- Test prompts in batches: Generate 3–4 variations with slight prompt tweaks to compare outcomes.
- Add music separately: Most free tools don’t include audio. Use free stock music libraries and edit in CapCut or Canva afterward.
Also, remember: Image to Video AI isn’t about perfection. It’s about speed and scalability. A “good enough” video posted today beats a “perfect” one delayed indefinitely.
Who Benefits Most from Photo to Video Tools?
While anyone can use these tools, certain roles see outsized value:
- Solo marketers juggling content across channels
- Small business owners without video budgets
- Educators needing quick visual aids
- Travel or lifestyle creators repurposing photo archives
If you regularly post on social media but lack time or resources for filming, photo to video conversion is a force multiplier. One image can become three pieces of content: a static post, a story, and a Reel—all from the same source.
Final Thoughts: Start Small, Think Motion-First
The real power of Image to Video AI isn’t in replacing videographers—it’s in democratizing motion. You don’t need advanced skills, just a willingness to experiment and refine.
Begin with one image. Write one clear prompt. See what happens. Then do it again. Over time, you’ll develop intuition for what works—and build a library of reusable templates.
And remember: the goal isn’t flawless cinema. It’s making your content feel alive. With consistent, thoughtful use of Image to Video AI, even a single photo can stop the scroll, convey emotion, or drive action.
So upload that picture. Type a simple instruction. And let the AI handle the rest. Your next piece of video content might be just five minutes away.